13- Since I installed a new wide screen monitor, when I print out the
floor plan I am only getting the
floor plan on 2/3rd of the paper.There
is no place you can specify the printout size of a floor plan.
DecoTech simply prints what you see on your screen.
A wider screen offers a wider working area. To fit a wider floor
plan on the same paper sheet size, DecoTech has to resize it.
This is why it covers less space on the page. If you use a 8.5"x14"
sheet instead of a 8.5"x11" sheet, the floor plan will cover
more space because the 8.5"x14" sheet
dimensions are more like the wide screen dimensions.
There is two
tricks you can try to get your wide (16:9 ratio) floor
plan printed as a normal (4:3 ratio) floor plan. First trick is
fast an easy to remember. Second trick is long, complicated and
hard to remember but it can let you specify the exact printout size
you want.
1st trick: Fast an
easy to remember
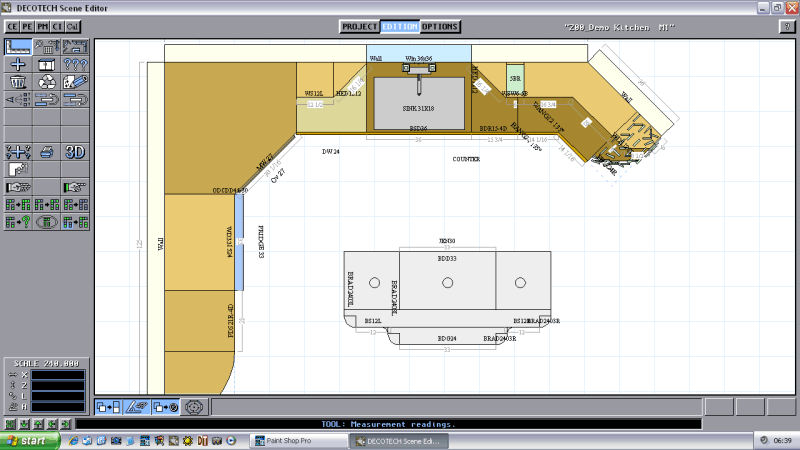
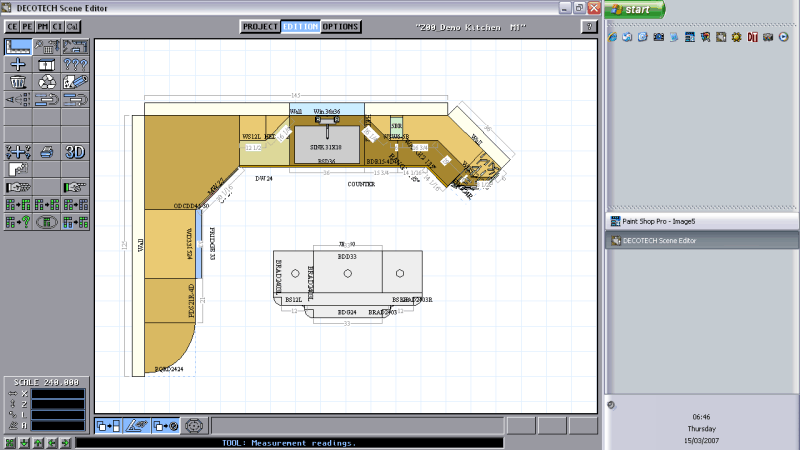
The image below shows how
Scene
Editor application looks on a wide 16:9
screen. The scale value indicates the number of
units that fits horizontally on the displayed floor plan. As you
see the floor plan is clipped at top and bottom because this project
has been created on a normal 4:3 screen with a specific scale value
for that screen size.
Note: On a 16:9 screen,
to see the same amount of units displayed vertically as on a 4:3
screen, the scale value must be multiplied by (16x3)/(9x4) = 48/36 =
4/3. So a scale of 240 on a 4:3 screen needs to be 320 on a 16:9
screen to avoid any vertical clipping.
The floor plan printout is identical
as what you see on your screen. To make the printout less wide
you simply need to make the
displayed floor
plan less wide on your
screen. When you run
Scene
Editor application it always uses the
maximum available area of your desktop. So you need to reduce
your desktop size before running
Scene
Editor application.
Note: The printing process always tries
to use the maximum printable area while keeping the same aspect ratio
of your displayed floor
plan. So it scales up the image until the first of its
width or height reaches
the printable area width
or height respectively.
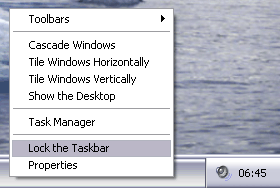
To
reduce your desktop size,
make a right click on an empty spot on the task bar until you get a
popup menu with the Lock the Taskbar option. Uncheck the
Lock
the Taskbar option.
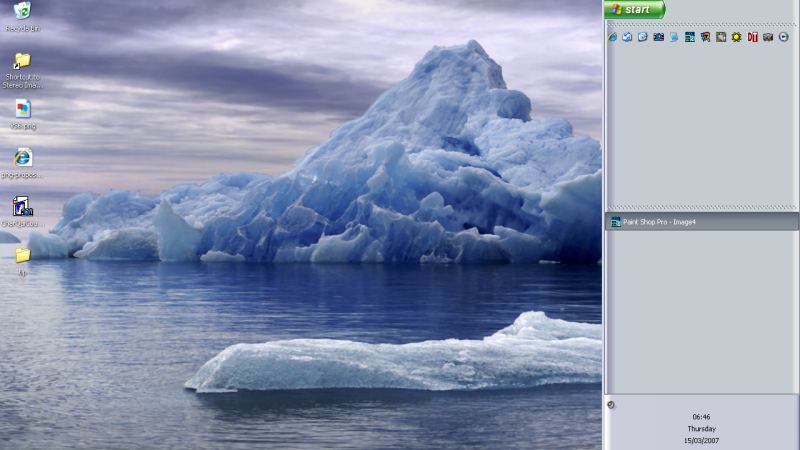
Hold down a left click on an empty
spot on the task bar and move it at the right of your screen, then
release the left click. Move the mouse pointer over the left
edge of the taskbar and resize it to 1/4 of your screen width.
Your desktop size will now be 3/4:1 of 16:9 so 12:9 = 4:3.
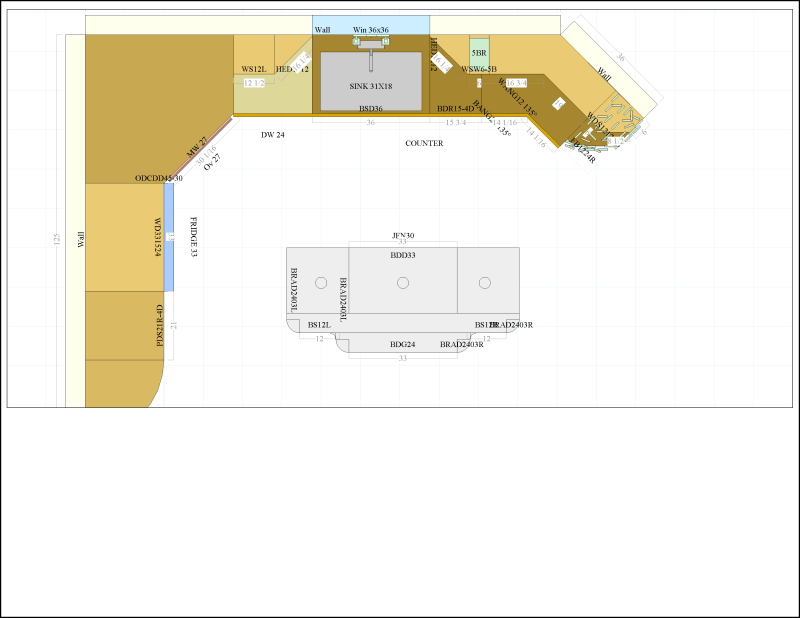
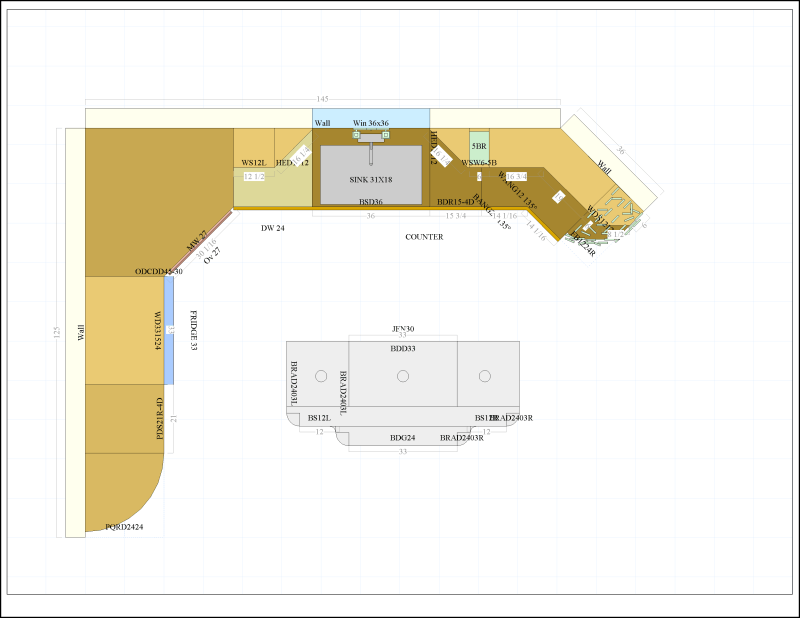
Run the Scene Editor
application.
As you see it now appears as on a 4:3 screen.
Again the floor plan printout is
identical as what you see on your screen. You may need to change
the scale value before printing to get bigger details of floor
plan. See also Tip #2 in the
Tips Spot.
2nd trick: Long, complicated,
hard to remember but very accurate.
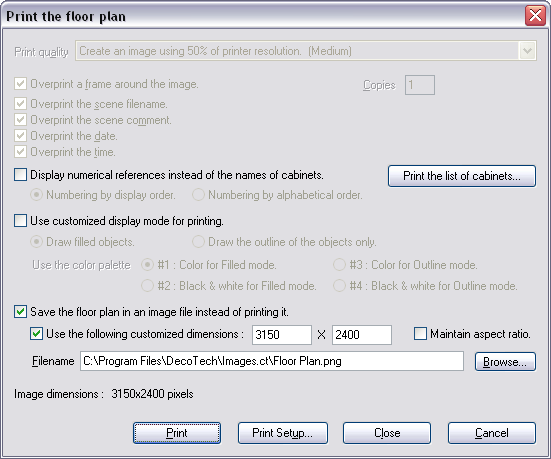
Instead of printing the floor plan
directly you can save an image of it with specific dimensions.
But you need to know your current printer resolution (Dots Per Inch)
and its maximum printable area. In
the example below we use an hypothetic
printer capable of 300 DPI with a printable area of
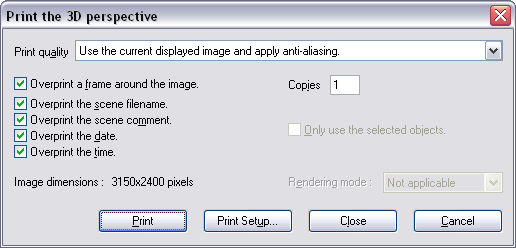
10.5"x8". Since we want the biggest possible printout
we will create and image of 300x10.5 X 300x8 = 3150 X 2400 pixels for
landscape printing. Select the Print button. The
floor plan image is saved and its proportions are independent from the
displayed floor plan proportions.
From here you can use any other 3rd
party applications to load and print the floor plan image. You can
also load it and print it with the Scene Editor
application. Simply
load the floor plan image the same way you load 3D perspective
images. The floor plan image will probably appear very huge on
your screen. Use the scroll bars to move the image.
If you notice that the text size on
the floor plan image is too small, then you will need to temporary
increase the text size, redo the floor plan printing/saving image,
then set back the text size to its previous value.
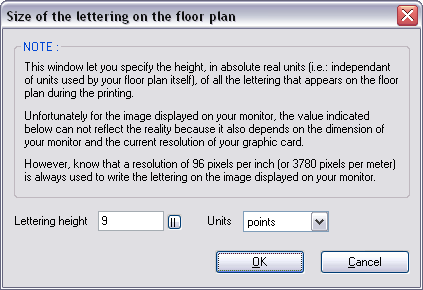
To change text size, select the top
center Options button, then the
Miscellaneous Options button, then the
Configure the size of the
lettering on the floor plan... button. Default
value is 9 points. (Example: If the text size on the floor plan
image appears to be 1/3rd of normal compared to objects around, then
multiply the lettering height by 3.)
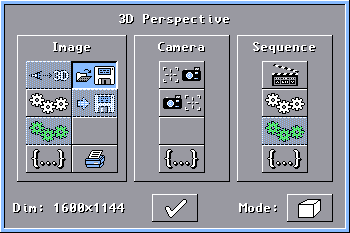
Once you are satisfied with the floor
plan image, print it the same way you print a normal 3D perspective
except that you need to change the Print quality to
Use
the current displayed image and apply anti-aliasing.
Once the printout is done, set back the Print quality to is
previous value then select the Close button. (Default
value is Create an image using 50% of printer resolution. (Medium).)
Note: The printing process always tries
to use the maximum printable area while keeping the same aspect ratio
of your displayed 3D
perspective. So it
scales up the 3D perspective until
the first of its width
or height reaches the printable
area width or height
respectively.

|